
Drums in the deep. Rumours fly of treasures and terrors. What lies in the deep caves, and what was the fate of the dwarven expedition, none can say. It’s down to intrepid adventurers to carve a path and return with answers or not at all.
My pledge for Dungeons and Lasers: Caves recently arrived and I jumped straight in with the core set for rocky caves. There are a few different themes but this is the one which I thought I’d get most use of. I’ve also been enjoying painting natural textures so this is going to give me a lot of practice and places to try other ideas and techniques.
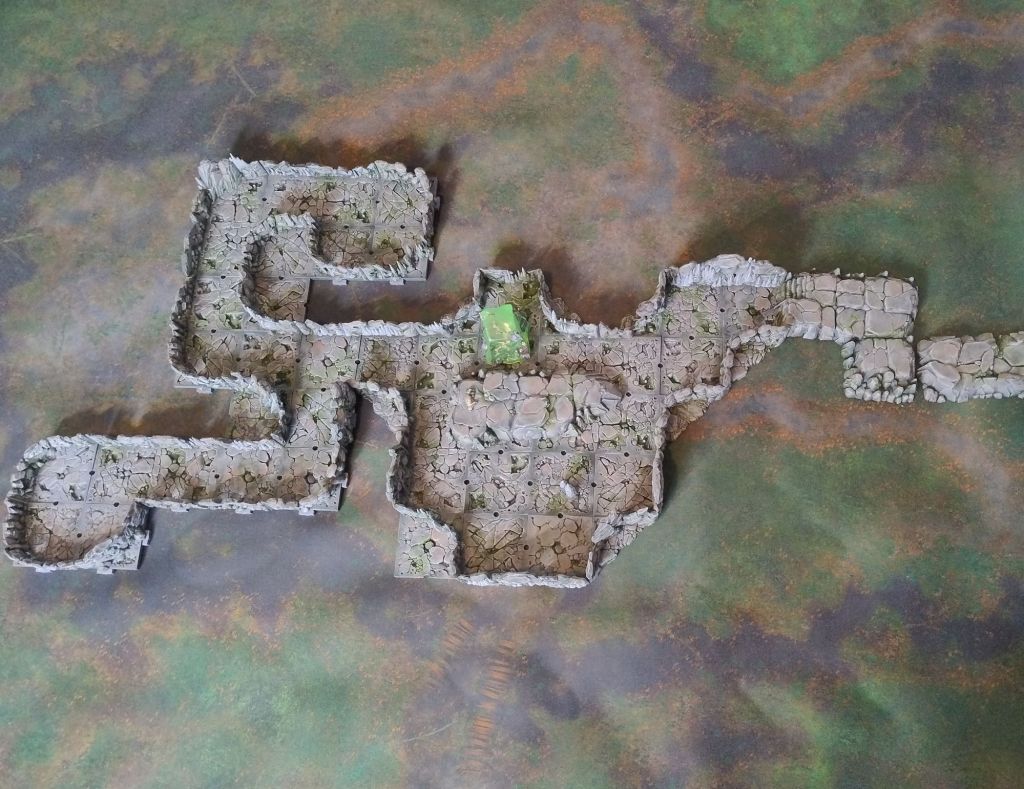
It uses the same clipping system as the previous Dungeons and Lasers terrain so is fully compatible with those sets. I already have a sizeable dungeon build and this can happily tag onto the side with no bother at all, perhaps from the dwarven mine. I also grabbed the subtheme sets for the spider nest, goblin lair, and deep mines which can easily be used together for a one-off themed adventure.
It doesn’t all flat pack like previous Dungeons and Lasers terrain (actually the floors still do so it’s still great for storage), but it’s not far off, and the benefit you gain from this is curved walls. This definitely improves things aesthetically given that these are caves and caves don’t tend to have a lot of straight lines in them.
Since it’s quite new, you might have to shop around to find the Caves set. I’ve found it available at Wayland Games.

Painting
This is so quick and easy to paint. Prime, wash, drybrush, details/effects, another drybrush, and you’re done.
It’s worth noting that pre-painted versions are available. I’ve seen some and was blown away by the quality. Given that the painting is a large part of my hobby, the pre-paints aren’t for me, but others who prefer to get something epic on the table very quickly will want to check these out. The minor downside with pre-painted is that you do have to clip them from the sprue and, of course, the clipped bit isn’t going to be painted. That said, most attachments to the sprue are underneath where they’re not seen, and the sprue colour is close to the painted colour so may not even be noticed (you can always touch them up with some paint).
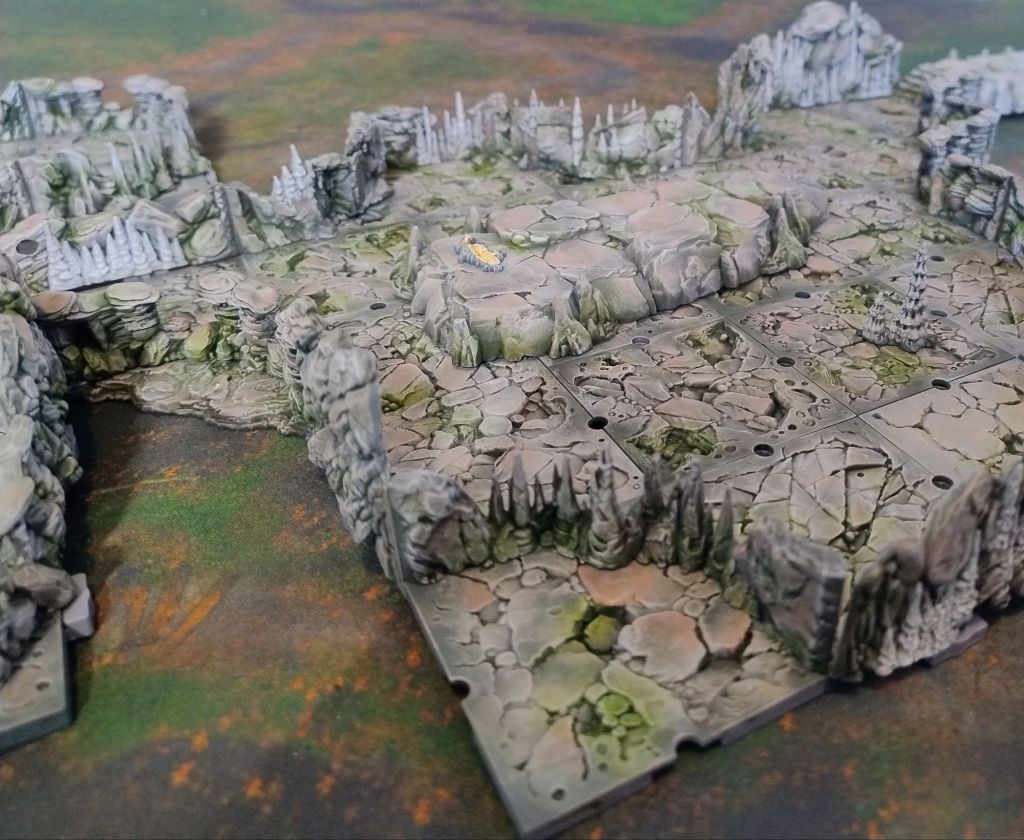
Here’s my core set build:


To get this effect, prime with Colour Forge Standard Grey primer then wash all over with GW Agrax Earthshade (thinned with water by about 50%) to really give it some depth. Next, get a big drybrush (I use the Army Painter Masterclass set) and do a heavy drybrush all over with GW Baneblade Brown.


Not all the walls have stalagmites and stalactites so the next step can be skipped if they don’t. Pick the stalagmites/stalactites out in GW Administratum Grey then wash them with GW Nuln Oil.
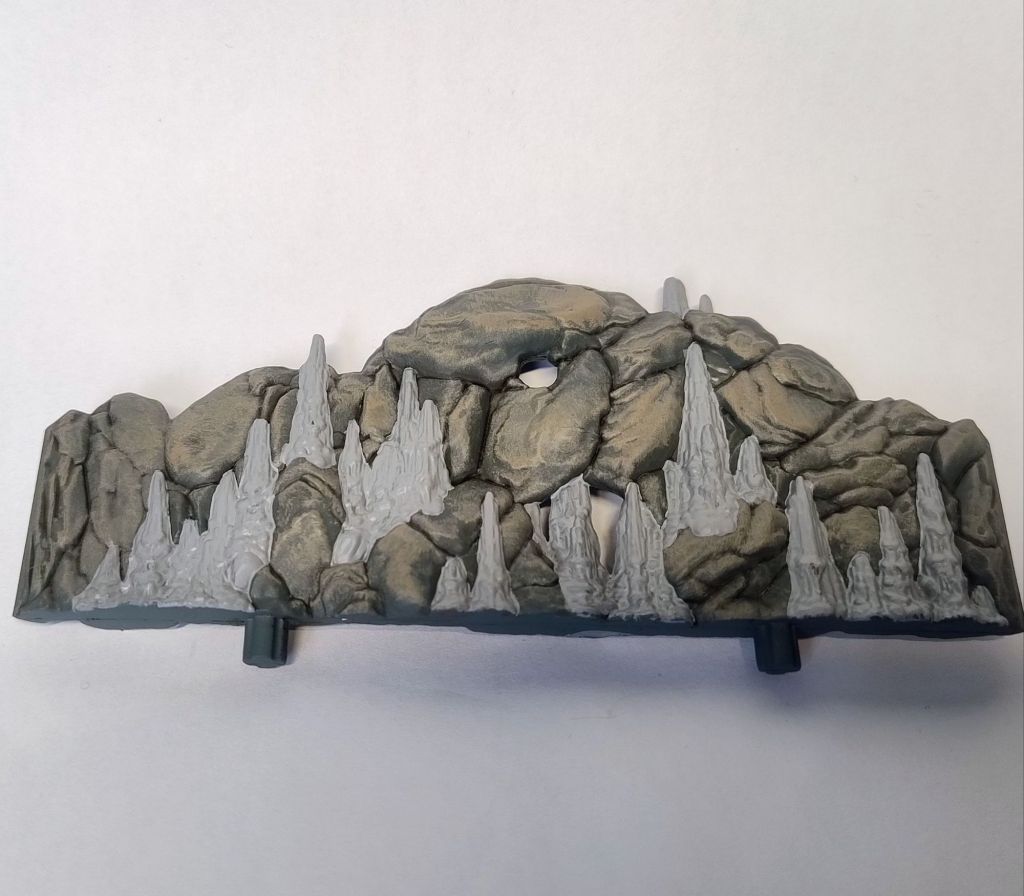

Next we have an all over medium drybrush of GW Administratum Grey.
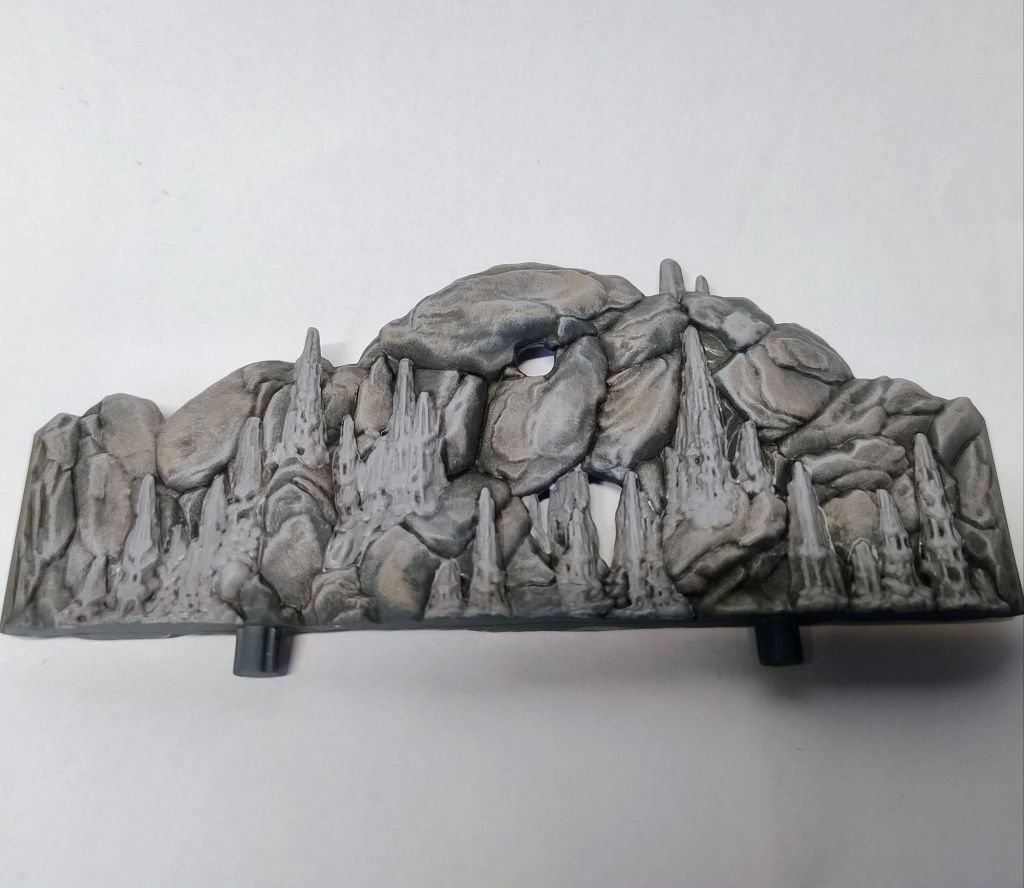
Here’s where it starts to get interesting. It’s all very grey right now so let’s give those rocks some variation. Thin some GW Bugman’s Glow with about 90% water then get most of the paint off the brush. Pick out some raised bits and corners and push the Bugman’s Glow across them. This is a technique I picked up in a lesson with Tommie Soule of Golem Painting (lovely guy, great painter, lessons highly recommended). It gives a nice, gradual blend – thinner where you started the brush stroke and stronger where the paint pools ever so slightly at the end.
Let’s also add some moss. I like the Dirty Down Moss Effect which I can only assume is made of magic and miracles. Thin it with about 50% water and paint in and around some recesses where you think water might drop and pool on the walls, and therefore moss might grow. Build up extra layers where a stronger green might stand out. You can be a bit messy. If you get a stark line at the edge of the moss effect, just use a brush with some water on it, nothing else. This will blend it right in with minimal effort.
Finally, give the whole thing a light drybrush of GW Ulthuan Grey. This is meant to pick out the sharper edges to really make them pop. Feel free to go heavier with this on stalagmites and stalactites to bring them out further.


That’s the full tutorial for the walls. I think they look great with lots of natural colours and textures.
Want to support the blog? You can pick up my fantasy short read, Mysticarium, for your Kindle or buy yourself some gaming goodies from Element Games and I’ll get a little kickback.

[…] rocks use the same process I used for the core set – quick and easy. Most of the effort is then on the […]
LikeLike
Really nice work on these. I just got my Caves set(s) in the mail a few days ago and will be keeping this blog post in mind as I paint it up. Yours turned out great!
LikeLiked by 1 person
[…] covered the process for the rocky bits here, so I’ll talk about the wood. After the wash, it’s a heavy drybrush of GW Mournfang […]
LikeLike
[…] stone and wooden struts follow the same recipe and process I used for the core set (tutorial here). There’s nothing complicated about the webs themselves either. They’re just Vallejo […]
LikeLike