
Having chosen Salamanders as my army for Warhammer 40k and Horus Heresy (I mostly use mk3 power armour and Forge World vehicles so they’re legal for both systems), I decided to use a paint scheme which would improve my blending skills. I’ll try to explain it step by step.
Fair warning: this isn’t a guide for someone just starting out. There’s nothing too complicated, but it is fiddly and takes an age. I’m not the greatest painter, and there are certainly better non-metallic metal painting tutorials out there, but this is how I do things.
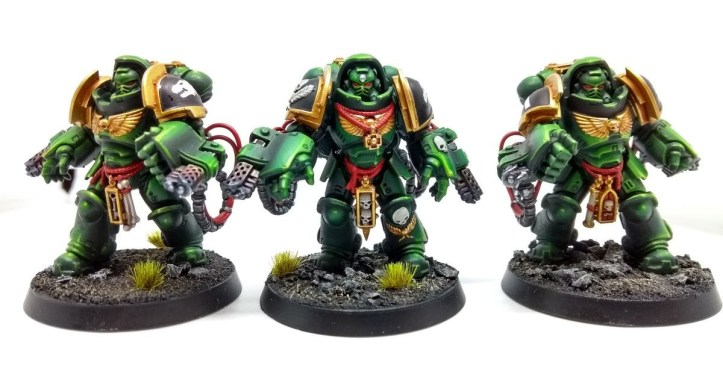
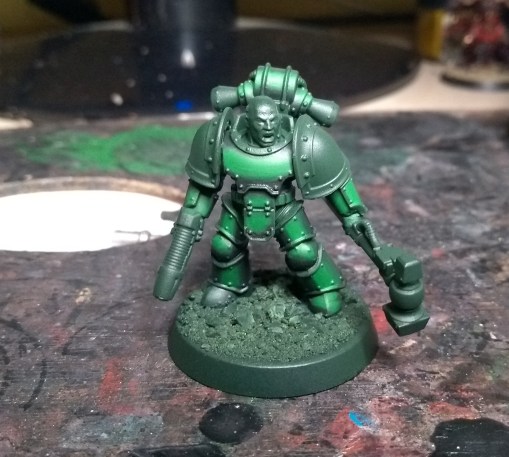
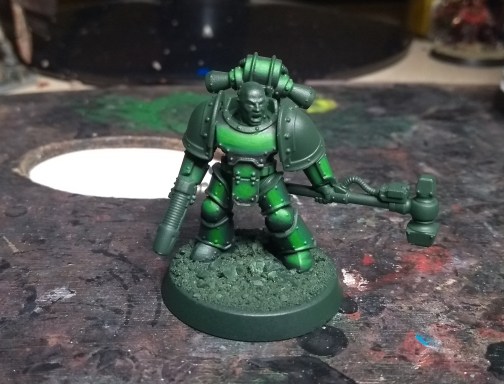
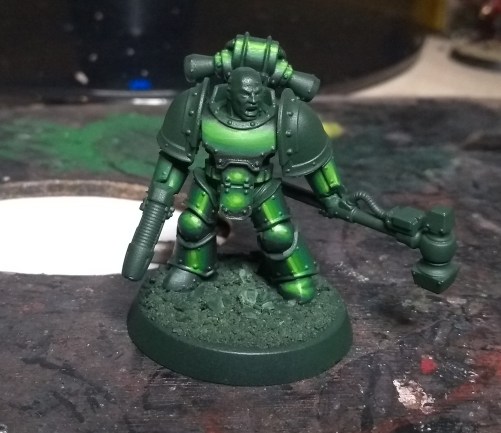
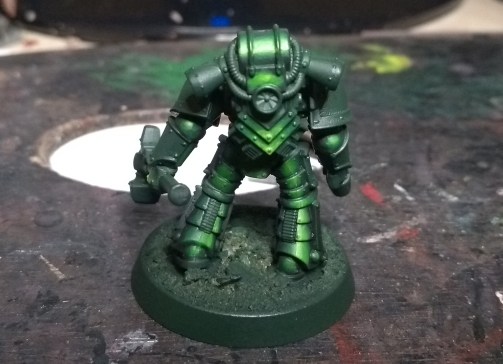
Here’s what we’re aiming for:
General Concepts
Since the aim is for a high-contrast finish, we need to pay attention to where light hits the model – lighter sections get more highlights, darker sections get more shading. To get this effect, we use dry blending (the previous layer is dry before applying the next) made up of many layers. Paints need to be very thin – more so than usual – about 70% water, 30% paint. As a vague guide, the Aggressors above have about 15 layers of green paint on the armour.
I use a mix of Games Workshop (GW), Vallejo Model Colour (VMC) and Vallejo Game Colour (VGC) paints here. If one is unavailable, you’re fine the use the equivalent of the other brand – neither are better as far as I’m concerned.
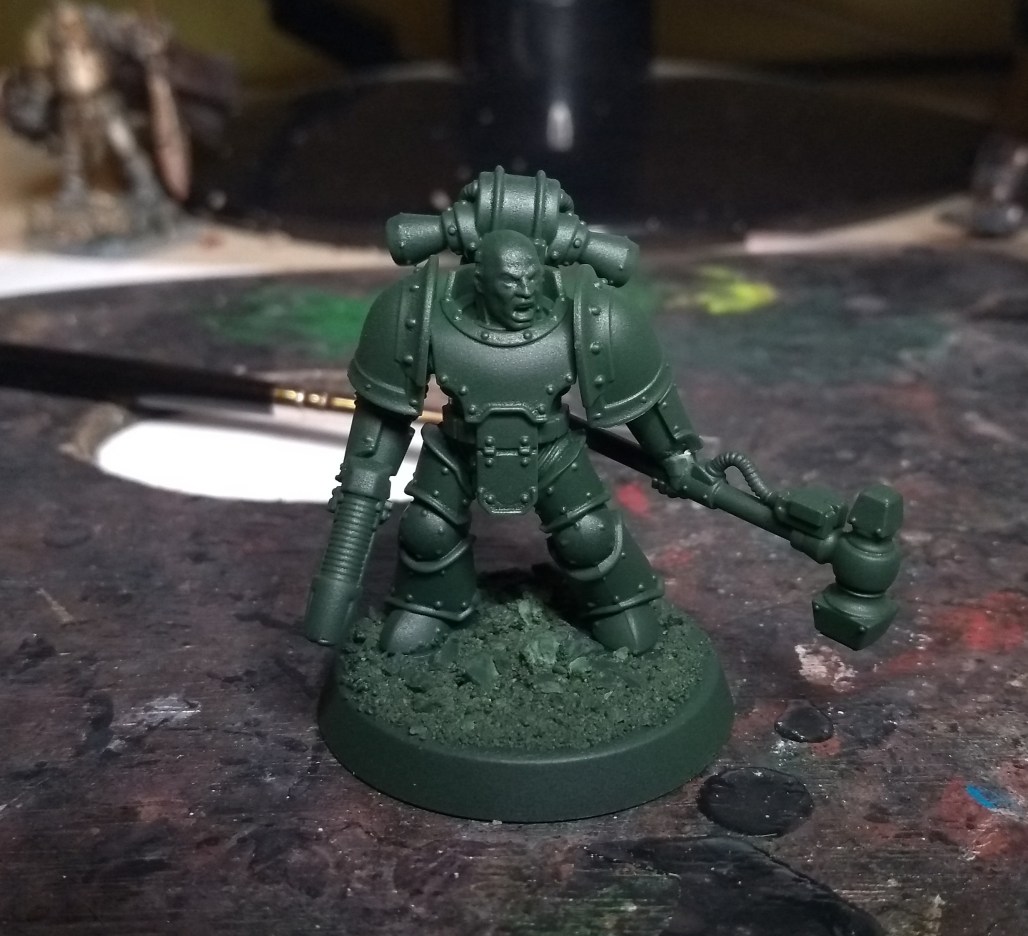
Step 1: Priming
Spray all over with Caliban Green. We’re going to highlight up and shade down from this.
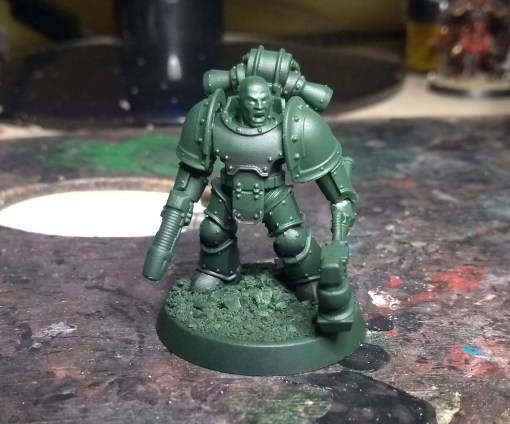
Step 2: Deep Shading
Look at the areas on the model which are in shadow. We’re going to shade these. Mix 50% GW Caliban Green with 50% VGC Black and paint the shadows.
Step 3: Shade Transition
This is the first bit of blending. We want to smooth the transition between the shade and base colour. Use GW Caliban Green and make sure it’s very thin (70%+ thinned).
Paint a line where the shade meets the base colour. Half the brush should cover the shade, half over the base colour. This may take a couple of layers to get a smooth blend.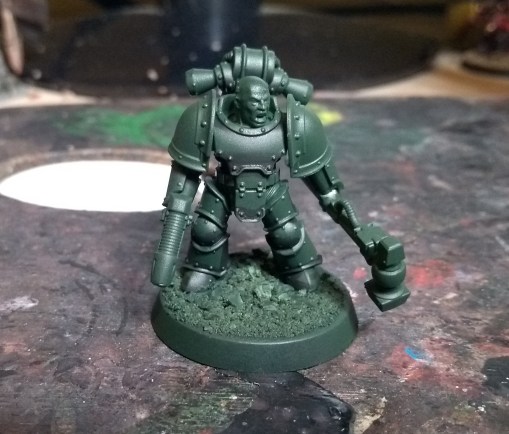
Step 4: First Highlight
Using a 50/50 mix of GW Caliban Green and GW Warpstone Glow, build up thin layers on the raised areas of the model. There isn’t much to see at this point but it will provide a smoother blend into the much brighter colours later. Note that each layer should work inwards from the last on a thinner, more raised area.

Step 5: Second Highlight
Again, working in towards the raised areas, build up thin layers of GW Warpstone Glow.
Step 6: Third Highlight
Keep working inwards towards those raised areas, this time with a 50/50 mix of GW Warpstone Glow and GW Moot Green.
Step 7: Fourth Highlight
Following the same process, use GW Moot Green for the next highlight.

Step 8: Final Highlight
Finally, use VMC Yellow Green to mark a line down the brightest areas of the model. This little pot of magic will really push the contrast and will be most obvious vertically on the legs and in the centre of the flat panels (like a bloom of light).
That’s all there is to the armour. If you’ve followed the tutorial or have another approach, I’d love to see the results.
Happy painting!
Want to support the blog? You can pick up my fantasy short read, Mysticarium, for your Kindle or buy yourself some gaming goodies from Element Games and I’ll get a little kickback.

That looks super nice. I feel like I should be trying to explore more advanced painting techniques like NMM and stuff. I don’t think I could blend as well as you are but the theory and you documentation of it makes it feel achievable. Nice work
LikeLiked by 1 person
Appreciate it, thanks. The blending gets quicker and easier after you’ve done a whole army this way.
LikeLike
So far I think my Possessed are the only models I think I have put that level of effort into… But they are all different schemes! It’s fun though and a lot less pressure than thinking… Ok, I want to do a “nice” paint job of my (insert army here)… Which means painting or repainting 50+ models that I already have for any of them
LikeLike
Thanks for sharing this is a really great tutorial. Any hope for a part 2 with the rest of the Salamander?
LikeLiked by 1 person
[…] on from the armour tutorial, here I show how I paint the weapons and metal parts of my Salamanders. This is a much simpler […]
LikeLike
[…] Part I: Armour […]
LikeLike
[…] are available for the armour, metals/weapons, and skin/plasma […]
LikeLike
[…] each project, I like to work on a different aspect of painting and/or basing. With the previous Salamanders project, I worked on blending and non-metallic metals concepts and basing to match the ‘black sands […]
LikeLike
[…] GW Warpstone Glow, followed by GW Moot Green. It follows the same process as shown in my blog about painting armour on Salamanders. Finally, the bit that sets it all off is a couple of very watery coats of Vallejo Yellow Green […]
LikeLike
[…] robes are mostly glazing. They essentially follow the same idea and colours as my tutorial on painting green armour for Salamanders but the idea is to keep the bulk of them close to Caliban Green and all that highlighting is […]
LikeLike