
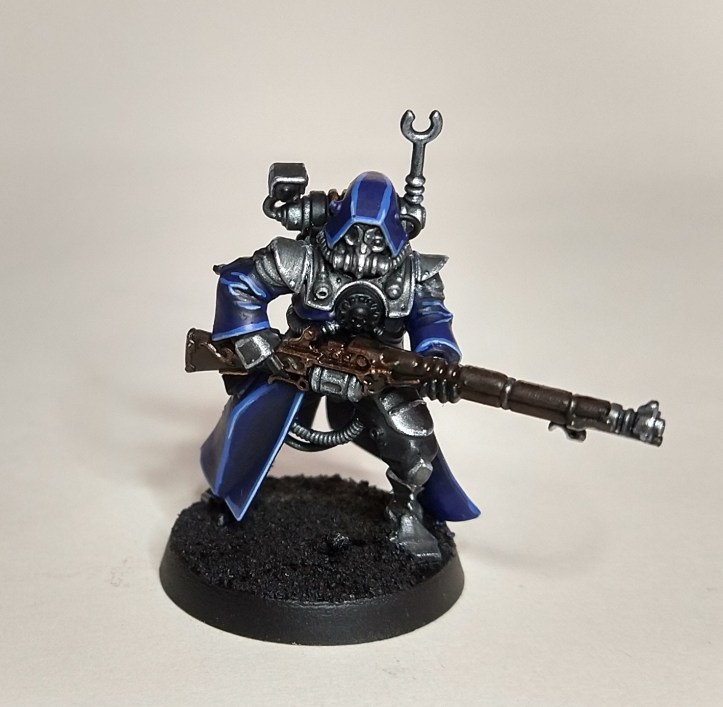
One of my latest painting projects is a small Adeptus Mechanicus force of Skitarii to match my Imperial Knights. Deep blue and metallics feature heavily so here’s a quick and simple guide showing how to do it.

Models are primed black as we’re looking for a darker finish.
Blue Cloak
Start with a couple of coats of Vallejo Stormy Blue (GW Kantor Blue is a good substitute).
Shade with a 50:50 mix of Stormy Blue and black. Thin this heavily with about 80% water and paint directly into the recessed folds in the cloak, under the shoulder plates and around any cables that run across the chest and back.
If you overstep with the shade or it’s too dark in places, don’t worry. Paint over the edges with Stormy Blue thinned with about 80% water. This should give you a simple blend.
To highlight, use Vallejo Ultramarine Blue and pick out any edges or raised areas on the cloak.
A final highlight of GW Fenrisian Grey finishes off the effect. Keep these lines thin and only to the sharp edges of the cloak. It’s usually easier to drag the side of the brush along the edges than it is to directly paint such a thin line.

Base coat 
Shade 
First highlight 
Second highlight
Metals
The silvery metal comes from a base coat of Vallejo Gunmetal Grey (substitute with GW Leadbelcher, if preferred), then washed all over with GW Nuln Oil. Then pick out all the edges with Vallejo Silver (or GW Stormhost Silver).
The coppery area on top of the backpack is done with a GW Warlock Bronze base coat, washed all over with Nuln Oil. Then drybrush GW Hashut Copper all over. The filigree across the rifle follows the same base coat and wash, but this time the Hashut Copper is thinned a little and painted only along the edges.

Base coats 
Wash 
Edge highlighted silver and drybrushed copper
Rifle
For that dark wood effect, use GW Rhinox Hide as a base coat, followed by a GW Agrax Earthshade wash. Highlight along the edges with Vallejo Earth.
Base coat 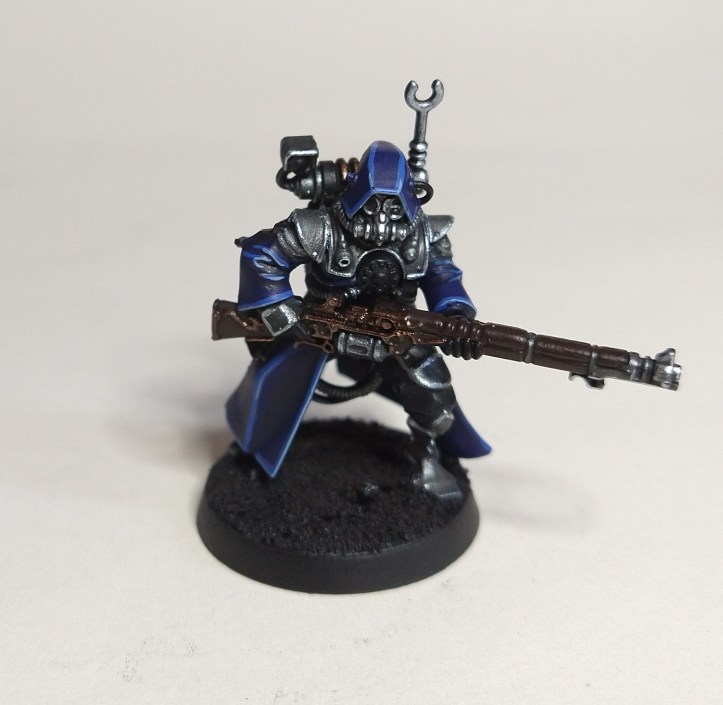
Wash 
Highlight
Eye Lenses, Lights and Others
Orange is opposite to blue on the colour wheel which makes it an ideal spot colour to contrast with the blue of the cloak.
The lights are simple. Use a couple of coats of GW Troll Slayer Orange, followed by a smaller dot of GW Fire Dragon Bright in the centre.
Eye lenses need to look more reflective. Paint a layer of black over the whole lens for a clean finish and to tidy up any overstepping when painting the face. Then paint a crescent of GW Troll Slayer Orange at the bottom of the lens with the tips of the crescent ending about half way up. Follow with a smaller crescent of GW Fire Dragon Bright within the first crescent. If you’re feeling adventurous, add a tiny dot of white near the top of the lens in the black section. Finish with a coat of gloss varnish for a shiny, reflective sheen.
Finally, the cables are just a single layer of Vallejo Magic Blue.

Details and first orange coat 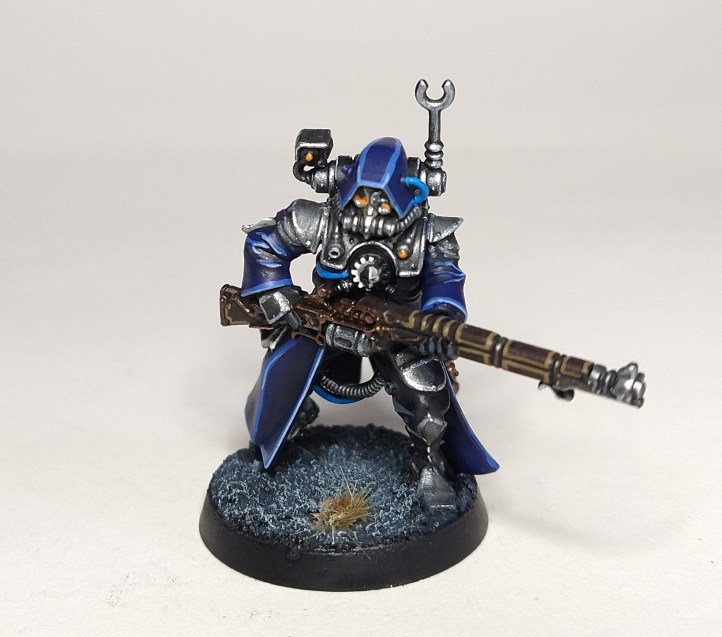
Second orange highlight and finishing touches
That’s the lot for this one. Feel free to drop any questions in the comments or share a cool Skitarii scheme that you’ve devised.
