
Inspired by the statue of Talos coming to life in Jason and the Argonauts, I decided to paint up the Stormcast Eternals sat on my shelf in the same theme. Here’s a step by step approach on how to achieve the effect of aged bronze. As with any of my painting tutorials, there’s no sorcery and minimal skill is needed (otherwise I wouldn’t be doing them).
Here’s what you need:

Black primer (okay, not in the photo)
GW warplock bronze
GW nuln oil
GW screaming bell
GW sycorax bronze
GW nihilakh oxide
Brush to base coat and wash (Element Games Masterclass Regiment brush here)
Drybrush (I used the GW Dry for most of the armour and an old Element Games Masterclass Character brush for more accuracy)
Start by priming black:
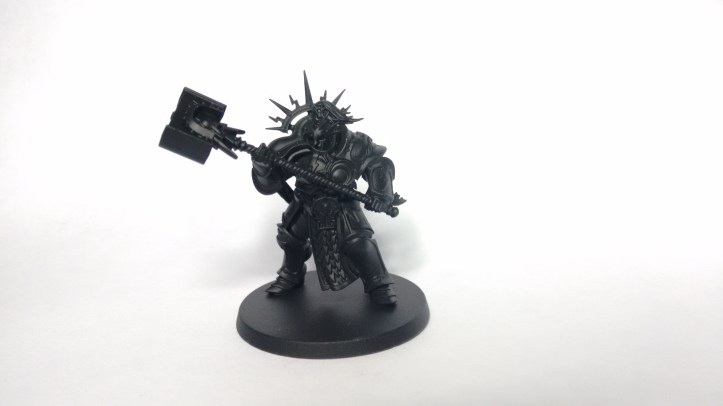
Dilute the warplock bronze to about 50% water, 50% paint and cover the armour using the base coating brush. I only needed one coat here:

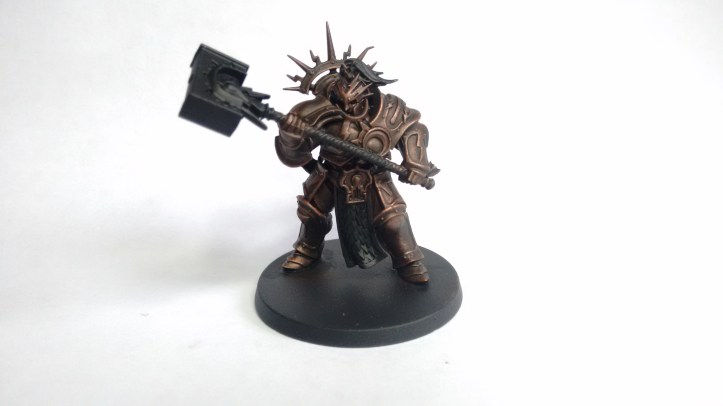
Wash the whole thing with nuln oil using the base coating brush:

With screaming bell, use the larger drybrush. Don’t be too heavy – the contrast against the dull, washed warplock bronze makes the highlights stand out more. This will add some shine and quickly start to look something like metal armour:
With the smaller drybrush to just pick out some of the edges and raised areas using sycorax bronze. I held the retributor in this picture under a daylight lamp and just lightly dragged the brush over the areas where the light caught it most. You could happily leave it here if your intention is for new bronze armour.
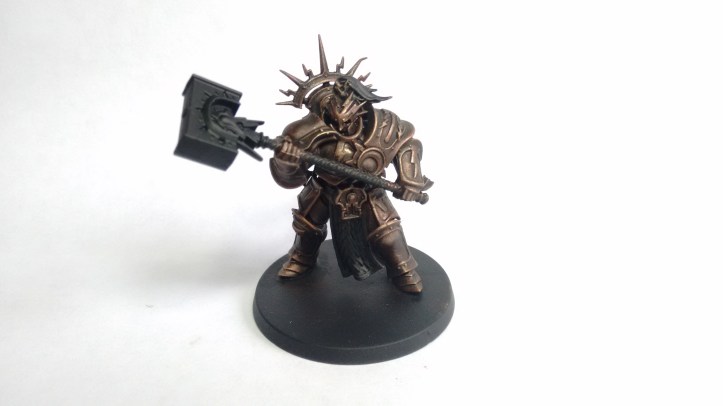
To age the armour, thin nihilakh oxide with about 75% water, 25% paint. If you don’t thin this, you’re just painting it turquoise. Using the base coating brush, push the thinned paint over the raised areas and into the recesses. This will subtly dull the raised areas and pool into the recesses where water might gather. Try not to go too crazy here because it’s easy to get carried away and ruin it. Paint the first layer, let it dry, then look again and think about whether you want a second layer.

I’ve been using this on my Stormcast Eternals but it’s easily repurposed for terrain. Statues, for example. An old, broken miniature might benefit from this technique and look great on a Frostgrave table. Here are some examples of how it looks on my Stormcasts:
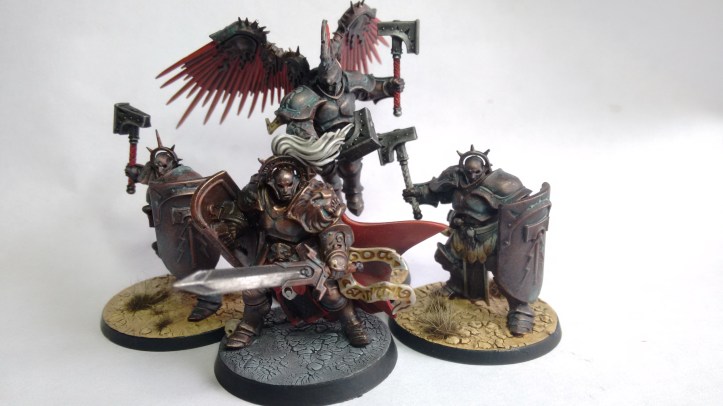
The biggest difference is between the flying prosecutor which has more nihilakh oxide layers and makes it look much older than the knight questor which has a more focused use of nihilakh oxide in the recesses and doesn’t look quite so ancient. Let me know if you use the technique, even if it looks better than mine! I’d like to see what others are doing.
Want to support the blog? You can pick up my fantasy short read, Mysticarium, for your Kindle or buy yourself some gaming goodies from Element Games and I’ll get a little kickback. Or you can always support through ko-fi.

[…] The Judicators required batch painting. While it’s not the most inspirational of methods, it gets the job done. Essentially, this consisted of base coating all colours before giving them an all-over wash of black. Then it was a matter of picking out highlights, mostly on the edges. For a tutorial on how to achieve the aged bronze armour, check here. […]
LikeLike
Thanks for the tutorial. I was not sure to start collecting some stormcast eternals because I find the official paint scheme boring. Then I saw your idea and liked it a lot. I just started the hobby and trying to copy you is really useful to improve.
LikeLike
I’m thrilled you like the paint scheme. Feel free to ask if anything is unclear and I’ll help as best I can. Good luck with your Stormcasts!
LikeLike
[…] some much-anticipated magic support to the Stormcasts. Her aged bronze armour follows the tutorial here and her cloth provided an opportunity to practice that tricky prospect of painting white. The […]
LikeLike
[…] You can find a tutorial for the rider’s aged bronze armour here. […]
LikeLike
thanks for the tutoria, my scion/knigth will look great
LikeLiked by 1 person
Do you think this look without the nihilakh oxide would go good on Minotaur space marine?
LikeLike
Absolutely. Just skip the nihilakh oxide step and it should be ideal for Minotaurs.
LikeLike
[…] standard, fast. It’s also my go-to approach for highlighting metallics – see my painting bronze armour blog for a […]
LikeLike
[…] guide focuses on the armour, robes, and details. For a guide to the bronze mace, click here. We’re looking for a vibrant effect so start by priming with Corax White […]
LikeLike